
If you’ve yet to optimise your daily life with your iPhone, then you’re totally missing out. We all love the user-friendly quality of the device and the ecosystem which results in a seamless experience. These benefits also translate over to the travelling domain. How many times have you flipped out over a missing toothbrush, or god forbid, your passport? Personally, one time is already too many. In the name of sparing these unnecessary accidents, keep reading for all the iPhone travelling hacks that may just be your saving grace.
It’s about to be peak vacation season. Who doesn’t love the idea of travelling—getting lost in the wanderlust of it all, wishfully shopping around for destinations and hotels, and outlining your itinerary all sounds hunky dory. Until reality hits, and you actually have to put thought into action. Every jet-setting traveller knows that the way to have the best time travelling is a roadmap that’s planned to a tee. Ahead, we’ve picked out our favourite iPhone hacks for travelling that will prove to be a godsend.
All the iPhone Travelling Hacks You Never Knew About
How to Take Passport Photo with iPhone

Who even has the time to go down to a photo studio these days? In this house, we only take a trip to the studio for exciting matters, like an editorial spread or a cover shoot. A passport photo can easily be captured right at home, all with just your Apple device. Plus, taking the matter into your own hands allows you to get the best passport photo, because, let’s be real, it matters so much.
Here’s how:
- Find a spot with great lighting, and be sure that nothing is covering your face.
- Use the Studio Light option under the Portrait Mode in your camera.
- Once the image is captured, tap and hold the subject to lift it from the background, then copy and paste the image into a new note in the Notes app.
- Take a screenshot of the note. Open it in Photos. Tap “Edit”, and “Crop.”
- In the top right corner, select the overlapping rectangles, and select your aspect ratio. Play around with the image until you have the best frame.
- Tap “Done”, and it’s ready for use!
Travel Packing Tips, but Make it Even Better
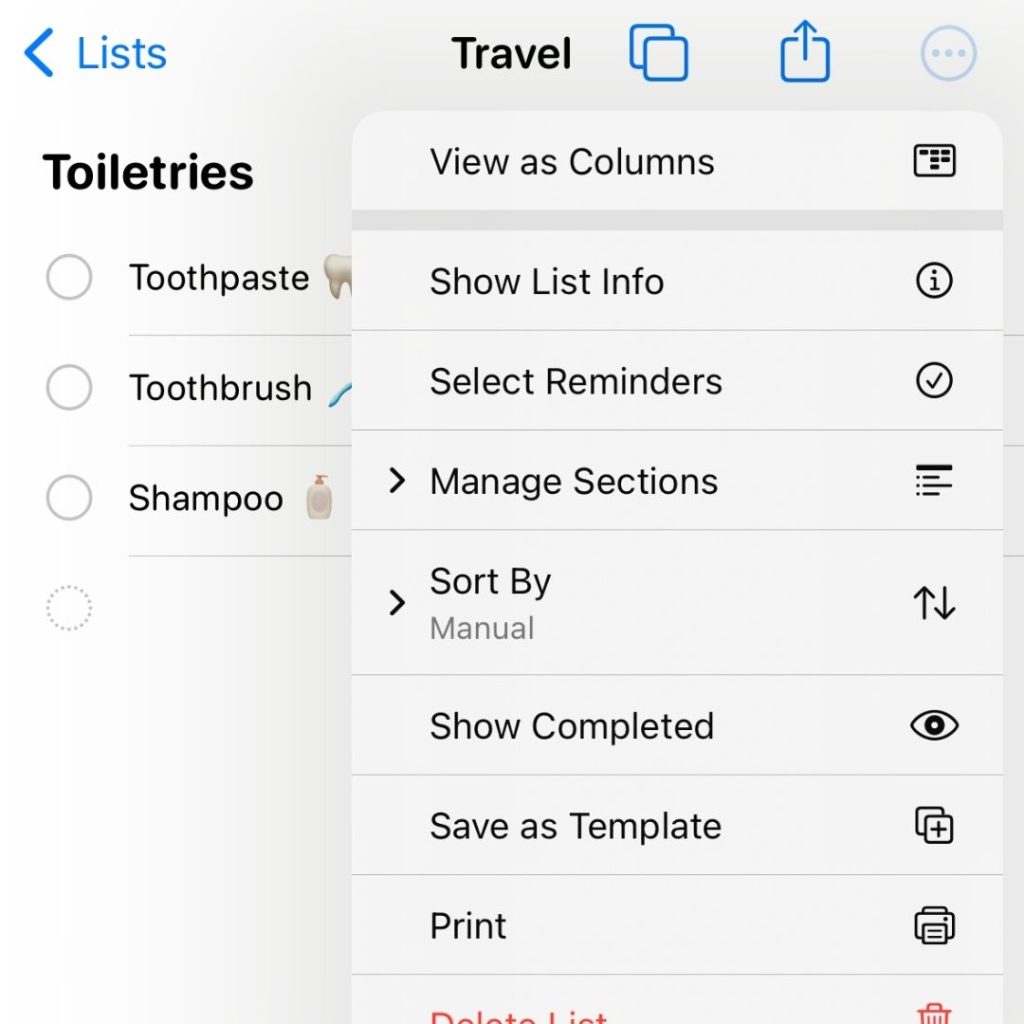
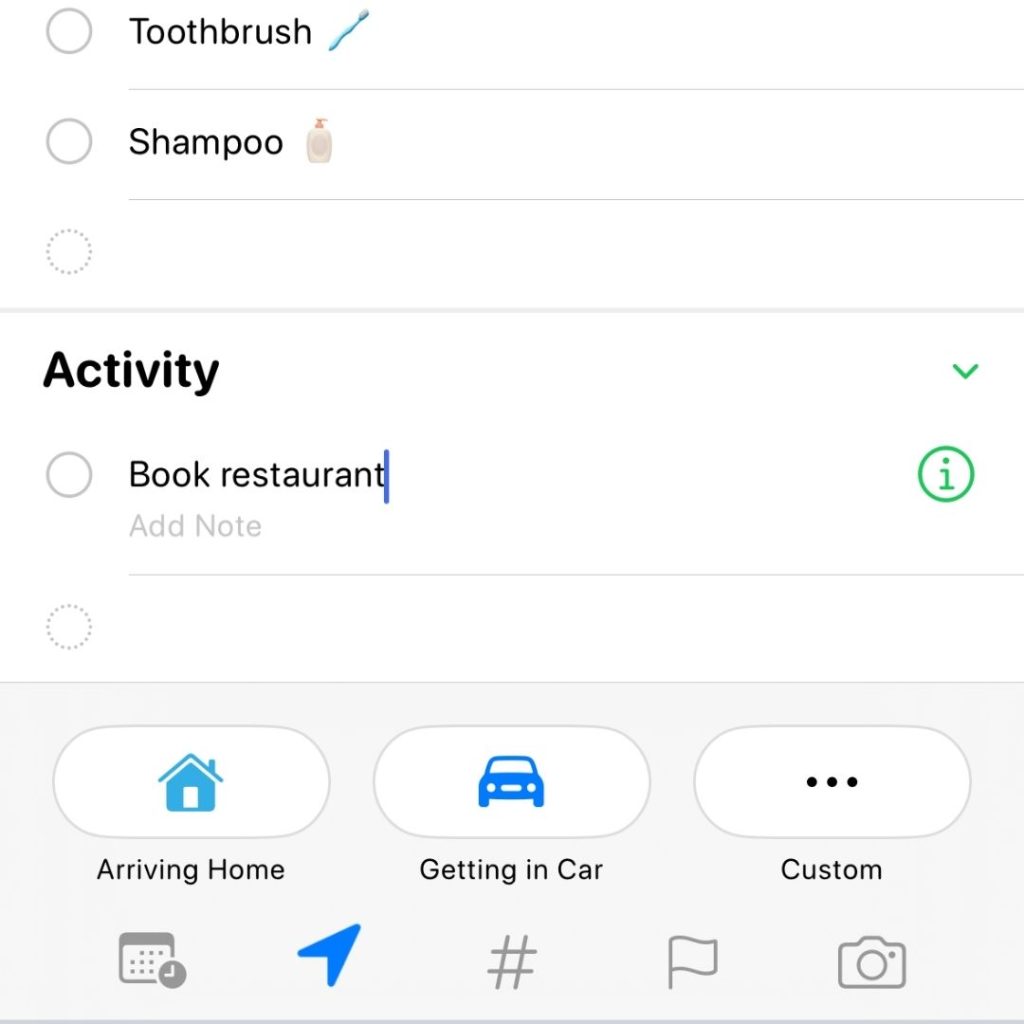
Don’t we all want to travel the world as much as we can? And when that is a possibility, there’s no need to put yourself through the hassle of making a list of what to pack all over again. For the most part, it’s the same repeat items (like toiletries, undergarments, etc), so why not prepare a template for this? Future trips will be even smoother, and with more and more use, you can even optimise the list.
Here’s how:
- Pop into the Reminders app, and create or select an existing list.
- Tap the three dots in the top right, then select “Save as Template.”
- Name the template and hit “Save.”
- To use, tap the overlapping squares icon to access your Templates and select the template you want to use, rename it, then hit “Create”. Modify as needed.
- Bonus: you can add a location to your reminder to trigger when you’re at a specific address. You can also set for the reminder to pop up upon arrival or your exit.
City Guide, Curated to Your Tastes
There are so many types of travellers out there. While some of us prioritise top food hotspots, others might want to check out museums and the best shopping haunts in town. As you cherrypick options in your research, you can add these specific locations to a list that’s yours to keep on the Apple Maps app. Travel companions can join in on the fun too, as lists can be shared. The best part? Key information is included in the overview, so you can pop for a visit without worrying about opening hours.
Here’s how:
- Open the Maps app, and scroll down to the My Guides section. Tap “New Guide” to start curating.
- Add a name to your guide, personalise it with a photo, and tap “Create”.
- To add a place, tap the plus sign on the bottom right, and just type in the location.
- Select the right one, tap the plus sign to add it, and hit “Done.”
- Bonus: To share it with your friends and followers, tap your picture or initials at the top right of the search
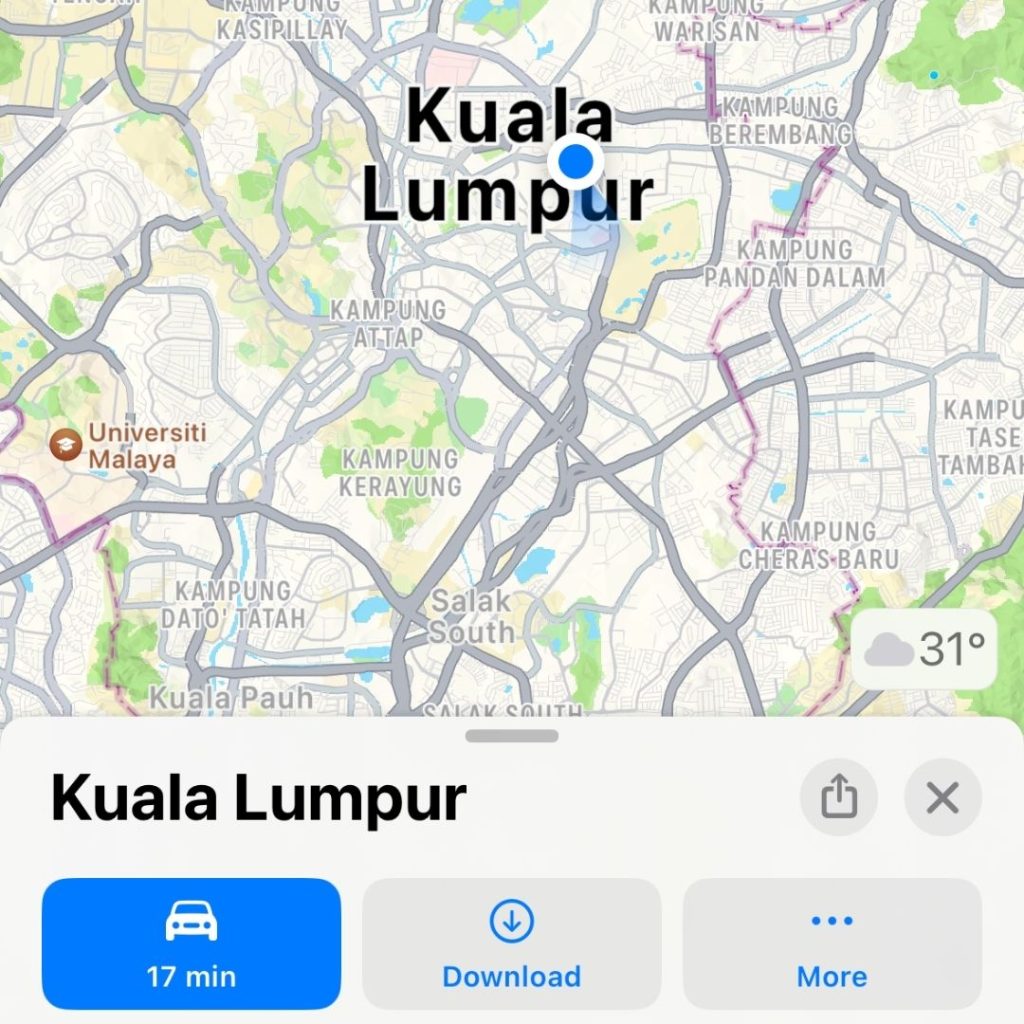
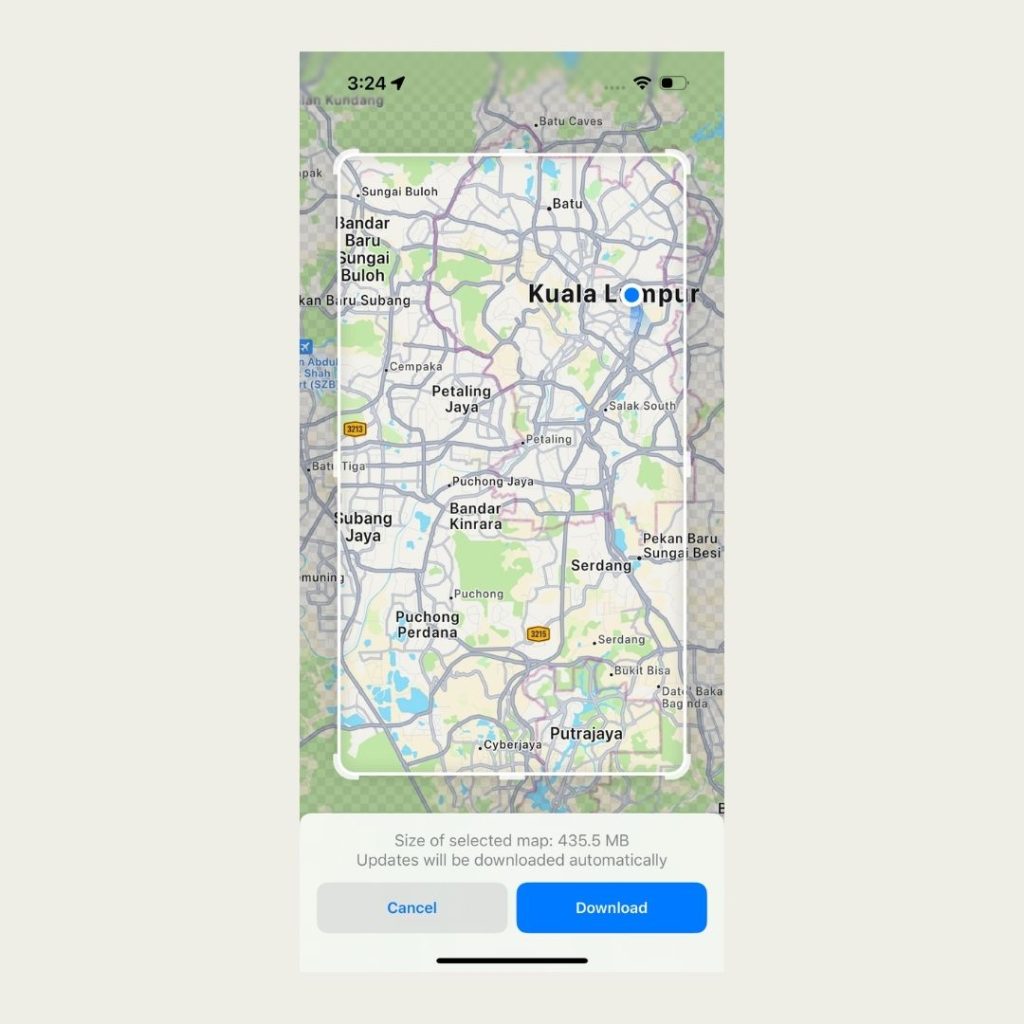
Additionally, you can also pre-save the map by downloading it, allowing you offline access, all while sparing you your roaming data for more important things, like posting on Instagram.
Here’s how:
- Search for the name of the area, and tap “Download.”
- You can adjust the size of the area of the map to optimise storage.
- Tap “Download” again to begin your download.
In Case of Emergency…
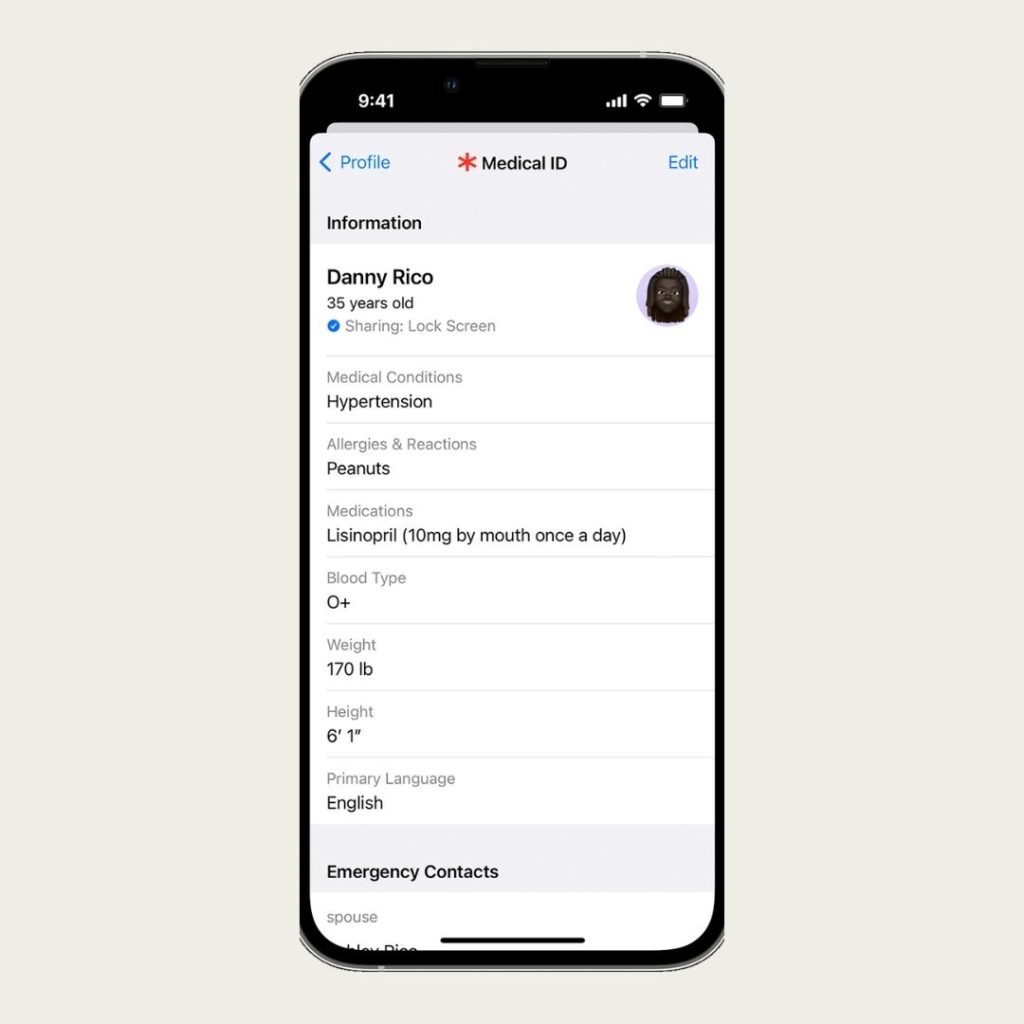
In an ideal world, accidents and emergencies don’t exist, particularly during travels. Alas, that’s not the case, and it’s always better to be over-prepared for such occasions. In any event of medical emergencies, your iPhone could be a treasure trove of information for those treating you. All you have to do is set up your Medical ID and add emergency contacts.
Here’s how:
- Open the Health app, and tap your profile picture or initials in the top right corner.
- Select “Medical ID”, tap “Edit”, and add essential information such as your blood type, medical conditions, allergies, and more.
- Add emergency contacts by scrolling to “Emergency Contacts” and tapping “Add.” If you call an emergency number, your iPhone will notify these contacts and share your location with them, if enabled.
- Bonus: If you call emergency services, the device will also automatically share your Medical ID with first responders. You can also enable Medical ID accessibility from a locked screen.
Translation on the Fly
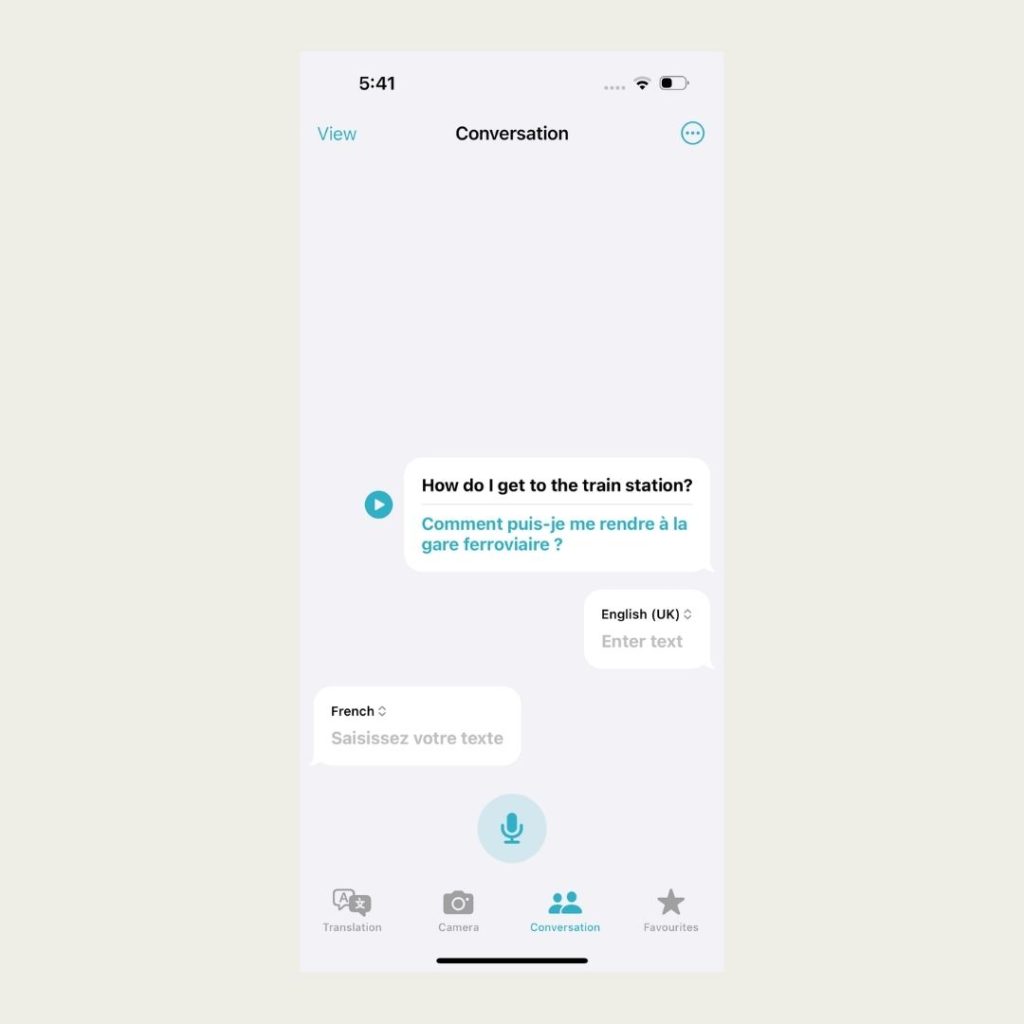
Ditch the phrasebook, it’s only going to take up space in your luggage and might have dated references. Instead, just whip out the Translate app whenever you need to speak to those you don’t share a common tongue with. It’s especially perfect for when you’re going on a tour of Europe, which is home to up to 24 official languages! Plus, this might be your best shot to go about your plans leaving nothing lost in translation (pun intended).
Here’s how:
- Go to the Translate app, and go into Conversation mode.
- Select the languages, enter text or tap the microphone to speak, and the app will automatically translate for you.
- Bonus: You can also use the Camera mode and point to text, and the app translates in real-time as you move the camera.
